Keeping Android and iOS version numbers in sync and up to date is a small but crucial part of mobile app development. Whether you’re preparing for a production release or testing on internal distribution channels, incrementing your app’s version code (Android) or build number (iOS) is a step you can’t skip.
Manually updating these numbers is error-prone and tedious, especially when working in a team or releasing frequently. Fortunately, with GitHub Actions, we can automate this entire process directly from our CI pipeline.
In this post, I’ll walk you through how to automatically bump version numbers for Android and iOS projects using GitHub CI, ensuring consistent versioning, fewer manual mistakes, and a smoother release workflow.
In a React Native project, we use Changesets that handles semantic versioning based on commit-level changes, serving as the source of truth for internal version bumps and release automation.
When a release is ready and merged into main, our GitHub CI pipeline automatically handles native versioning for both Android and iOS.
- Merging
developintomaintriggers Changesets to publish a new release, bumping thepackage.jsonversion according to semantic versioning rules. - A GitHub Actions workflow, configured to run on every push to
main, picks up this version bump. - For Android, the workflow reads the existing
versionCodefrombuild.gradleand increments it by 1. - For iOS, it reads the new version directly from
package.jsonand sets it as theCFBundleShortVersionStringinInfo.plist. - Finally, the updated Android and iOS version files are committed and pushed back to the
mainbranch.
name: Release
on:
push:
branches:
- main
concurrency: ${{ github.workflow }}-${{ github.ref }}
env:
ANDROID_PATH: android/app/build.gradle
ANDROID_VERSION_CODE: 0
VERSION_NAME: ''
jobs:
release:
name: Release
timeout-minutes: 15
runs-on: macos-latest
steps:
- name: Checkout Repository
uses: actions/checkout@v4
- name: Setup Node
uses: actions/setup-node@v4
with:
node-version: 22
- name: Install Dependencies
run: yarn
- name: Install Bash 4 and GNU sed on Mac
run: |
brew install gnu-sed
echo "/usr/local/bin" >> $GITHUB_PATH
echo "$(brew --prefix)/opt/gnu-sed/libexec/gnubin" >> $GITHUB_PATH
- name: Extract existing version code for Android
run: |
# Extract version number from package.json
version_name=$(grep "version" package.json | sed 's/^.*"version": "//g' | sed 's/",$//g')
# Get existing version code from build.gradle
android_version_code=$(grep "versionCode" ${{ env.ANDROID_PATH }} | awk '{print $2}' | tr -d '\n')
# Increment existing version code by 1
android_version_code=$((android_version_code + 1))
# Set environment variable for later use
echo "VERSION_NAME=$version_name" >> $GITHUB_ENV
echo "ANDROID_VERSION_CODE=$android_version_code" >> $GITHUB_ENV
- name: Increase version code and change version name for Android
run: |
# Update build.gradle with new version code and name
echo "${{ env.ANDROID_VERSION_CODE }}"
sed -i "s/versionCode [0-9]\+/versionCode ${{ env.ANDROID_VERSION_CODE }}/g" ${{ env.ANDROID_PATH }}
sed -i "s/versionName \"[^\"]*\"/versionName \"${{ env.VERSION_NAME }}\"/g" ${{ env.ANDROID_PATH }}
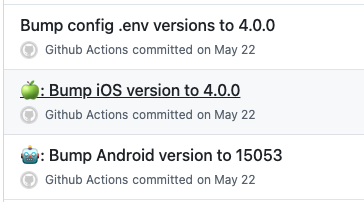
- name: Commit and push changes
run: |
git config user.email "github-actions@github.com"
git config user.name "Github Actions"
git commit -am "🤖: Bump Android version to ${{ env.ANDROID_VERSION_CODE }}"
git push origin HEAD
- uses: yanamura/ios-bump-version@v1
with:
version: ${{ env.VERSION_NAME }}
project-path: ios
- name: Commit and push changes
run: |
git config user.email "github-actions@github.com"
git config user.name "Github Actions"
git commit -am "🍏: Bump iOS version to ${{ env.VERSION_NAME }}"
git push origin HEAD
- name: Bump versions for each config environment file
run: |
find config -type f -name '*.env' | xargs gsed -i -e 's/APP_VERSION=\"[^\"]*\"/APP_VERSION=\"${{ env.VERSION_NAME }}\"/g'
git config user.email "github-actions@github.com"
git config user.name "Github Actions"
git commit -am "Bump config .env versions to ${{ env.VERSION_NAME }}"
git push origin HEAD